Not sure if you realized when I blogged about the tree but there was no tree skirt! Yes my poor tree has been sans skirt since last Sunday...until today! I do own a tree skirt but unfortunately it didn't really go with the tree decor - it was rather traditional. I decided to make my own because I couldn't seem to find green or blue tree skirt - who would have thought?? So today I made one. I had seen directions a few weeks back on how to make one from a tablecloth and that is just what I did. I looked for a week for a fun green or blue tablecloth but it was rather hard. Today I came up this one and settled (our tree was getting cold at night)

After ironing the 70' round tablecloth it was time to start cutting and sewing. I folded it into quarters and cut a quarter circle which once unfolded was a circle in the middle.

Next I cut a line from one edge to the center in order to put the skirt around the tree:

At this stage it looks just like a tablecloth with some cuts in it but I am not done. I used a needle and thread to make gathers around the edges. I used dark green thread (because that is what I had) and started stitching:

At first I didn't really think about how many stitches for each gather but once I made the first one I realized needed to make four stitches on the top and three underneath. Once the stitches were in you pull the thread tight and tie a knot to secure the thread and make the gather:

I decided to just eye it and try to equally space the gathers out. For a project like this you don't have to be precise but you can always measure if you would like.

You can see above the two gathers - I continued stitching and put gathers around the entire skirt. Once I was done and made sure the thread was secure, it was time to put it on the tree:

This was so easy and only cost $10! Eventually we will get a real tree skirt but for now this one will do! Now it's time to wrap the presents and put them around the tree.
Also this weekend I brought red velvet cupcakes to a get together with some girls. I was lucky enough to have my mom bake them for me last weekend and all I had to do was frost them! Truth be told I have had some issues making red velvet cupcakes in the past and need to get back on the red velvet horse again real soon because these are my absolute favorite. Usually we use a butter cream frosting but since I wanted to frost them with a bag and tip I used cream cheese frosting. The cream cheese frosting was so easy ( 16 oz cream cheese, 1 stick of butter, and 2 1/2 cups of confectionery sugar) doesn't get any easier than that!
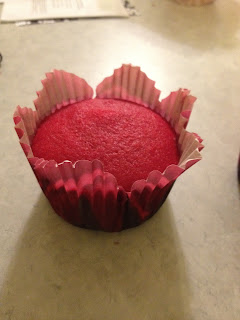
I started with the defrosted cupcakes...my mom used cool flower petal cupcake tins which were really pretty. I will have to say usually decorative tins end up not looking as nice because the batter darkens them and the design is hard to see but these were nice because of the petals:
I thought I had wider decorating tips than I had but I made do with the ones I had. I tried just the star tip and the plain circle tip:


These look pretty good but they were missing a bit of holiday spirit - red and green SPRINKLES!!

And there you have it - Red Velvet goodness. I know I still owe you the buffalo chicken mac 'n cheese post and I will share it this week I promise. I can't keep up with all the projects. On a sidenote my husband fixed our alley door today (yay!) but I assumed no one would really appreciate a post about that :)
Until next time...Stay Creative!!
No comments:
Post a Comment